Take a wedding clip. The couple stands under a stone arch, the light is soft, and this is the take they want. Then you notice the man in a red jacket walking behind them, eyes on his phone.
You can't reshoot a wedding. The old fix is an evening in After Effects or DaVinci Resolve: mask him, track the camera, patch the gap and clean up the frames the tools get wrong. The newer fix is to describe the change in one sentence. You get the same take back with that change made, and the motion, the camera move and the timing stay as filmed.
I build Aisma, an editor for footage you have already shot, so much of my week goes into reading briefs and comparing results with the originals. The examples below come from it, but the method carries over to any prompt-based editor.
Four situations that used to mean a reshoot
Someone walked through the shot
Name the thing and its side effects: a person with their shadow or reflection, a cable with its plug. If the surface underneath matters, say so ("show the sand behind it"). The gap is generated from the surrounding scene, not recovered footage, so it holds up well against sand, sidewalk, lawn or a plain wall and gets harder where the object crosses a face or lettering. The sound stays, too: a removed motorcycle can still be heard.
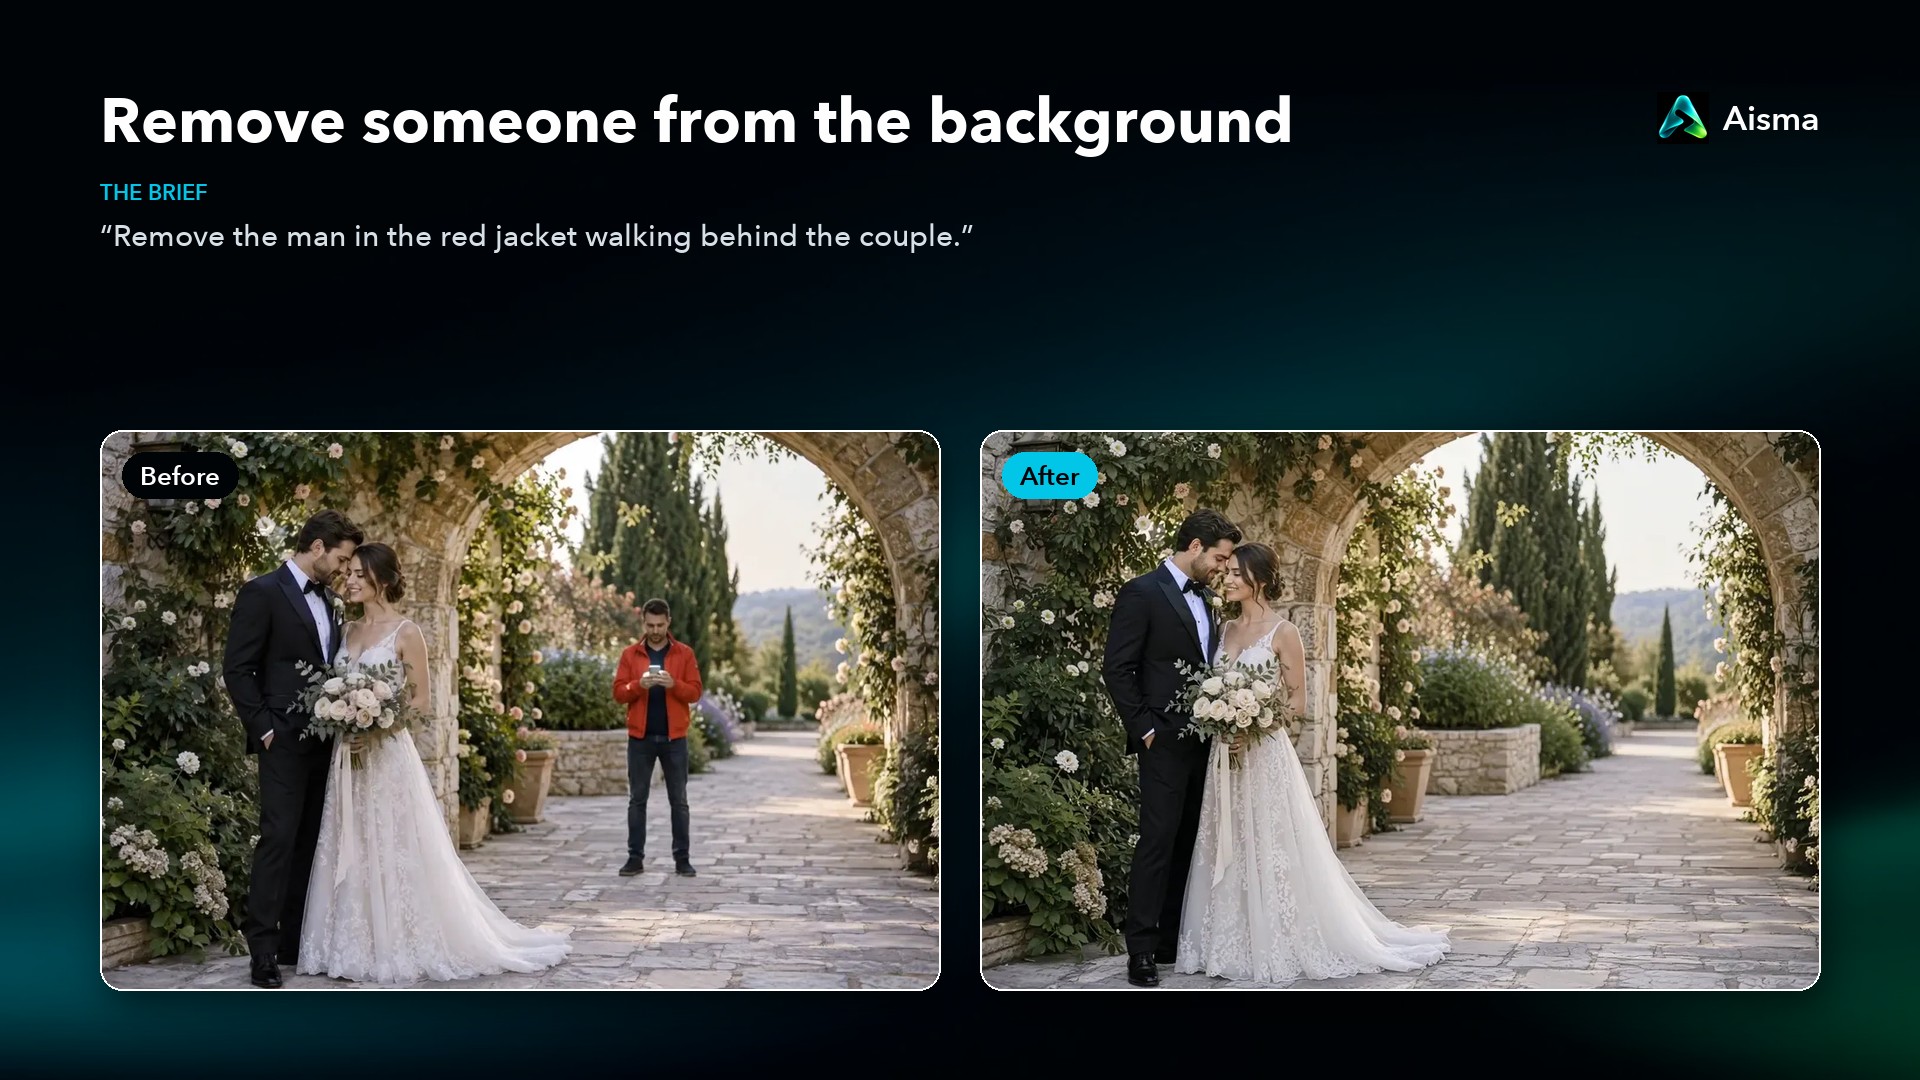
Brief: "Remove the man in the red jacket walking behind the couple."
The outfit is wrong
A brief can change a whole outfit, one garment or just a color, from words alone or from a photo of the garment. The face, hair and movement stay. Be careful what you ask to keep: one brief that asked to keep the sneakers got exactly that, white sneakers under a gown. It's a look, not a fitting: nothing is measured.
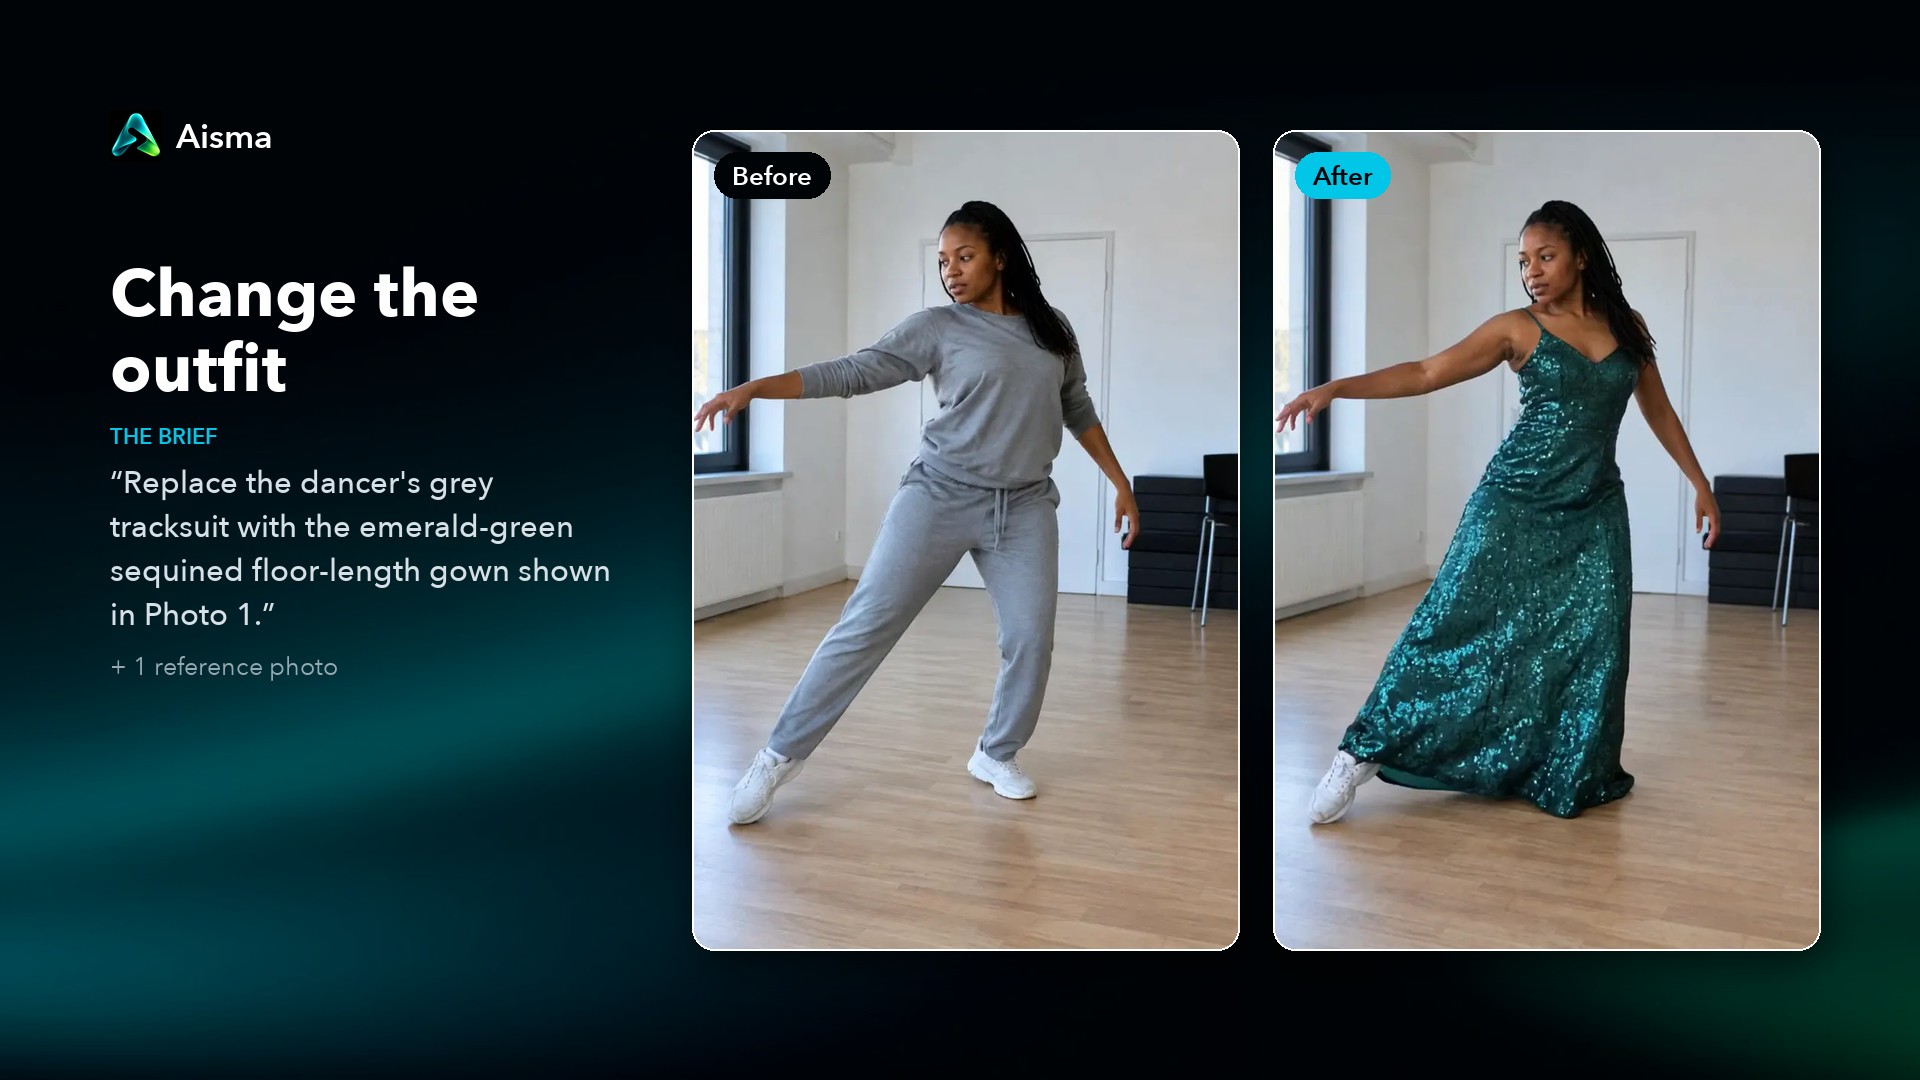
Brief, with one reference photo of the gown: "Replace the dancer's grey tracksuit with the emerald-green sequined floor-length gown shown in Photo 1."
The location is dull
You don't need a green screen. Write the place and the time of day, then what stays, then the light. Put "the original camera movement" on the keep list, and for shiny objects ask for matching reflections. You get a finished video with the new scene built in, not a cut-out.
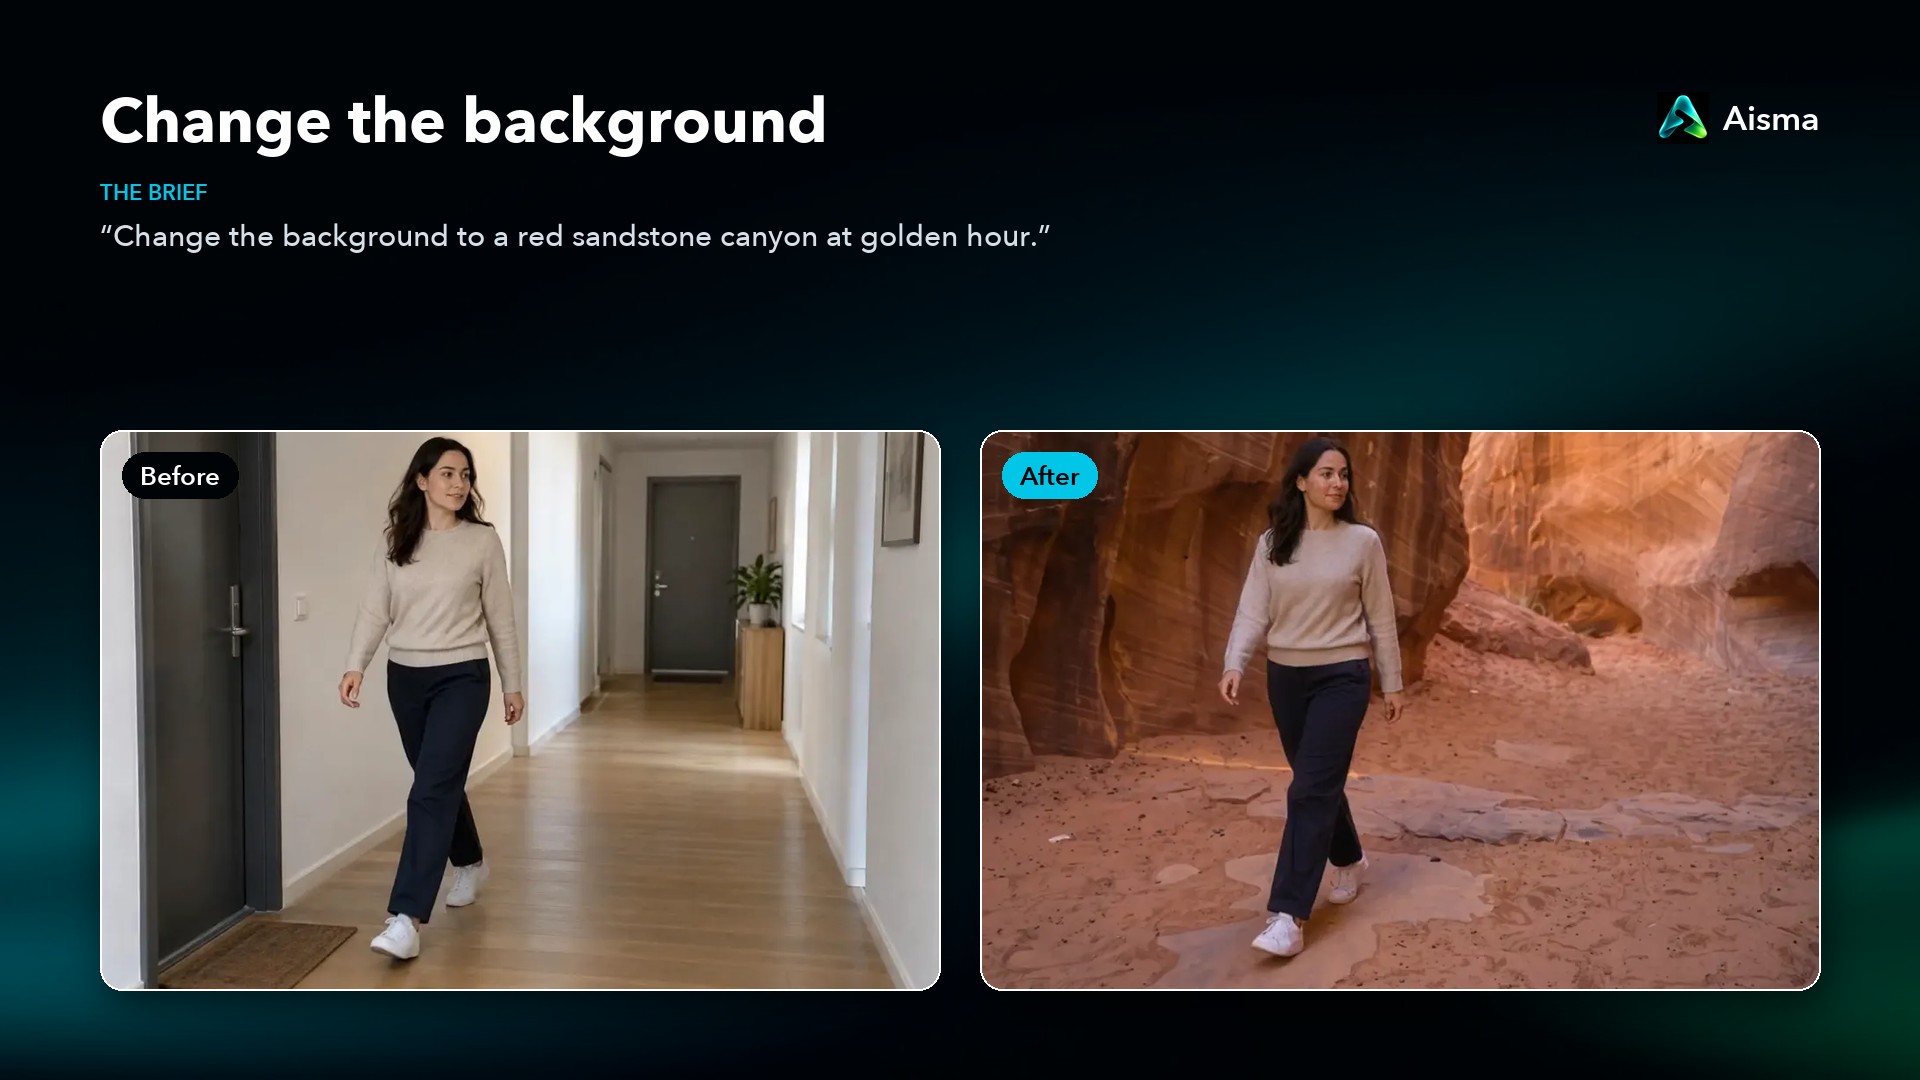
Brief: "Change the background to a red sandstone canyon at golden hour."
You need a different person on camera
Whole-person replacement works from reference photos. The face, hair, skin tone and often the clothes come from the photos. The gestures, the room and the camera move come from the clip. The voice doesn't change, so this suits clips carried by music or a voiceover you record separately.
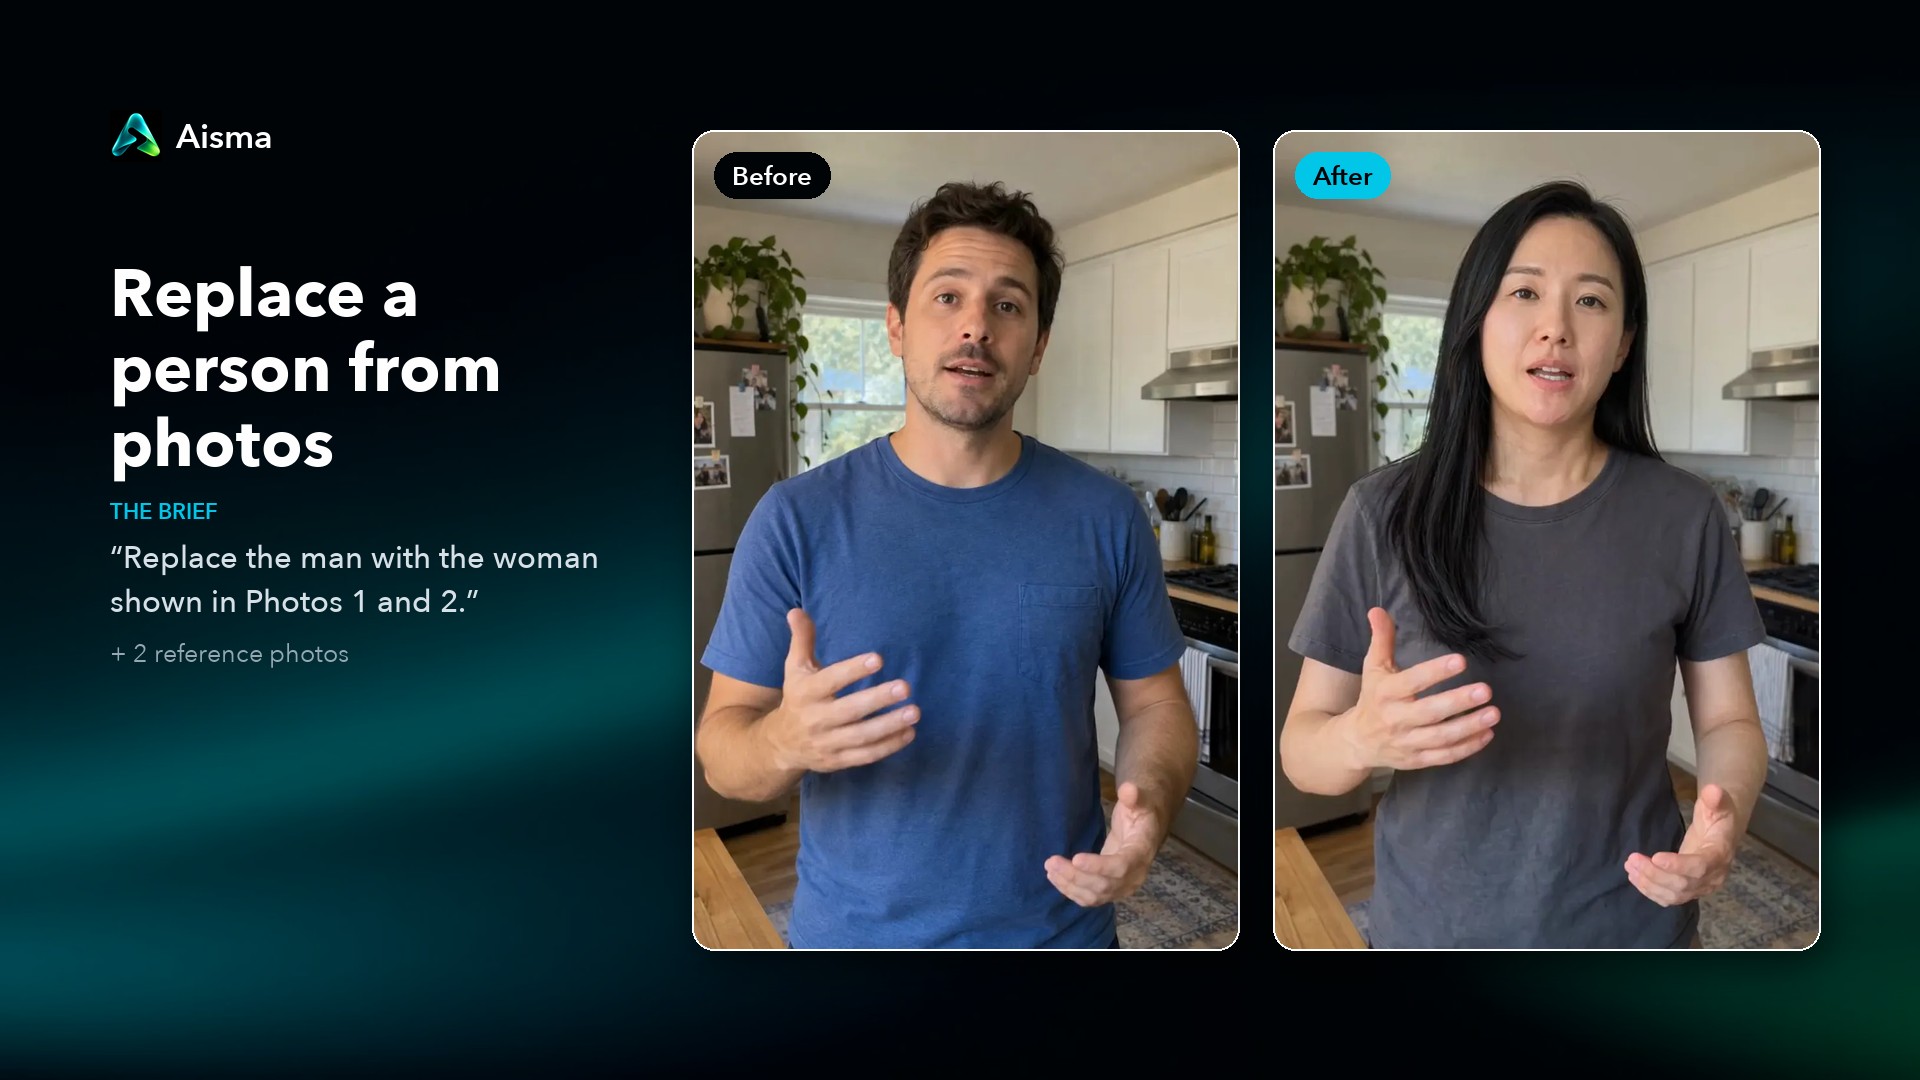
Brief, with two reference photos: "Replace the man with the woman shown in Photos 1 and 2."
These four briefs are one line each because every clip had one obvious thing to change. In a busier shot, add the keep sentence described below.
Prepare the clip before you write anything
A lot of misses are decided before the brief is even written.
Trim first. Cut to the moment you need in your usual editor before you upload. Cropping, captions and music belong there too.
Make the target easy to see. A steady, well-lit clip where the thing isn't hidden behind hands or other people. For clothes, show the whole outfit. For a face, keep it in view at a steady distance.
Look for lookalikes. If the shot has two orange signs and the brief says "the orange sign", expect one to stay.
Write the brief: what changes, what stays, where and when
The brief now does the job the mask used to do, and whatever you leave open, the editor fills in. I write mine in this order:
Lead with a plain verb. Change, remove, replace, swap or make. Describe the thing as the camera sees it now, then what it becomes.
Point to one thing. Name it by color, position or action, the way you'd point it out to a friend: "the woman on the far left", "the jogger who runs through at the end".
Add a keep sentence. List what sits near the change, from the closest thing outward: its own details, then the person, the place, the light and the camera.
Name keeps exactly. In one run, "preserve the blue T-shirt" was overridden by the clothes in the reference photos. "Bright royal-blue crew-neck T-shirt" held.
Give a time only when it matters. "From 0:04 to the end" or "from 0:05 to 0:12". With no time, the change covers the whole clip.
Describe what the viewer should see. Words like mask, track and keyframe don't help. Words for pace, like slowly or all at once, do.
Here is how that changes a brief:
Weak: "Make his shirt look nicer."
Better: "Change his white T-shirt to a deep forest-green T-shirt. Keep the same fabric, fit, folds and collar. Keep his face, hair, earring, movement, the wall, lighting and camera."
Weak: "New background, something nice."
Better: "Change the background to a snow-covered pine forest path in bright winter daylight. Keep the walking woman, her clothes and the original camera movement. Match the cool daylight on her."
One change per run is the most predictable. If you need three, run the most important first, then start the next edit from the finished clip. More full briefs are on our page about editing your own footage with a written prompt.
Reference photos: when words aren't enough
Words cover a kind of thing. A photo pins down one exact thing. "A green denim jacket" is a job for words; the jacket from your own catalog needs a photo.
Garments: the whole piece in focus on a plain background, as a flat lay, on a hanger or on a dress form. A photo of someone wearing it works if you add "use only the outfit from Photo 1".
Products: shoot it like a listing: one product per photo, fully in frame, soft light, from the angle the clip shows most. Shape comes from the photo, so state the size if it must match; I've seen a jar come back taller.
Places: a place photo is treated as a guide and rebuilt around the person, so some details will differ.
People: two sharp, evenly lit portraits of the same person, one from the front and one at three-quarters, with no sunglasses, groups or filters. Show them in what they should wear on screen, because clothes can carry over.
Call the photos Photo 1, Photo 2 and so on, and say what each one shows. With two people, pair them in words: "the man on the left with Photos 1 and 2, the woman on the right with Photos 3 and 4". Faces are where photo quality matters most, and the guide to a video face swap from your own photos shows which portraits work.
Testing it on one clip: the passer-by at the arch
Step 1: Trim and write one line
Trim to the take under the arch, then write the brief shown under the first frame above. The red jacket and the walk single him out.
Step 2: Check what came back
In the result he is gone, and the couple, the arch and the camera move stay as filmed. Watch it full screen, then at quarter speed, checking each change and then each keep against the brief. Then look for things you never mentioned:
The edges where something was removed, plus any shadow or reflection it left. Here that means the stone behind his path.
Hands near anything that changed, faces turning to profile, every shot cut, and small lettering or logos.
Step 3: Fix only the part that missed
If one stretch misses, redo that part with a short clarification, such as naming his shadow, instead of rewriting the whole brief. Results vary with the clip and the request, so a second pass is normal.
Doing this in Aisma
Aisma takes one clip of 2 to 60 seconds, MP4 or MOV, up to 500 MB, vertical, square or horizontal, and clips with several shots work. For a longer video, cut it into parts of up to 60 seconds and edit each one. Briefs can be in any language, with up to 10 reference photos. You get an MP4 at 720p or 1080p with the same length, framing and sound. It works shot by shot, so shots your request doesn't touch stay as filmed. On the web, it may first ask which photo goes with which person. Edit a clip redoes only the part that missed, and Recreate brings back the original clip, photos and brief for rewording.
Where it still falls short
A full restyle into clay or watercolor redraws the people too. To keep someone photographic, restyle only the background.
A removal over a patterned rug or a crowd has to invent far more than one over a plain wall.
Consent and disclosure
Owning the footage doesn't mean you own everyone in it. Use only footage and faces you have the right to use, and get written permission from anyone whose face or body you change or replace, including the person in your reference photos. Never put real people in situations they didn't agree to, and take extra care with minors. For realistic edits, use YouTube's altered or synthetic content setting and TikTok's AI-generated label.
Before you upload: a short checklist
The clip is trimmed to the moment you need.
The target is visible and well lit in most frames.
You know which lookalike you mean.
The brief opens with one change and a plain verb, then a keep sentence that names what's nearby, exactly.
Photos are numbered in the brief and show one thing each.
Everyone whose face or body changes has agreed.
Reshoot when you need a new angle, a new line of dialogue or a wider frame. For a passer-by, a wrong jacket or a plain hallway, write one clear sentence first. It's usually quicker than a second day on set, and you still have the original if it misses.